This tool comes from a discussion in Aquaticplantcentral.com forums posted by D9vin: the Aquarium CO2 calculator on the Fishfriend.com website.
If you have instituted a
regimen of fertilizing your plants, have sufficient light and are disappointed with growth, this tool may provide an
answer to part of the equation. The function of plants in the aquarium aside from being aesthetically pleasing, is to help balance the environment. Plants inhale dissolved CO2 from the water and take C02 up from the roots. They exhale O2 which in turn is used by the livestock and the cycle repeats as long as there is balance.
For
those of you who are beyond the pretty-fish-in-the-tank stage, the tools
we list in the Toollbox tab give you the ability to get the answers to
aquarium issues efficiently, so you can get back to what you really
love; enjoying your hard work

Showing posts with label aquariums. Show all posts
Showing posts with label aquariums. Show all posts
Monday, September 5, 2011
Sunday, September 4, 2011
Long Overdue
Life outside the front door created a couple of adventures for me the last year. This blog was sadly neglected right along with the aquariums; circumstances beyond and whatnot. It seems Blogger underwent yet another renovation; good time to give Aqua~gillie a facelift. As with most things where creative control is not wide open, there will be tweeks.
Three tanks are running at the moment; two 10g and a 5g. Of the 10g, one is fish and the other shrimp. The 5g is meant to be a grow-out but life's adventures interrupted the plans.
10g Shrimparium:
5g Grow-out:
In the meantime, check out the
AQ Advisor link in the Tools section. In the short time this aquarium livestock tool has been available, almost a thousand freshwater species have been added as well as a salt water calculator and a new forum. Stop by and show the AQ Advisor some love!
 | ||
| 10g~Shrimparium; Aponogeton ulvaceus, |
Three tanks are running at the moment; two 10g and a 5g. Of the 10g, one is fish and the other shrimp. The 5g is meant to be a grow-out but life's adventures interrupted the plans.
10g Shrimparium:
- Flourite Black substrate
- Cryptocoryne lutea
- Aponogeton ulvaceus
- Aponogeton ulvaceus seedlings
- Peacock moss wall
- Mystery plant
- Red Cherry Shrimp
- 80% gravel/20% Flourite black
- Mopani driftwood
- Anubias
- Java Fern
- maybe a stray C. lutea
- 1 adult Sunset Mollie ~ with a herd of babies
- 1 White Cloud Mountain minnow
- 2 American Ghost/Grass shrimp
- 1 Olive nerite snail
- Malaysian Trumpet snails
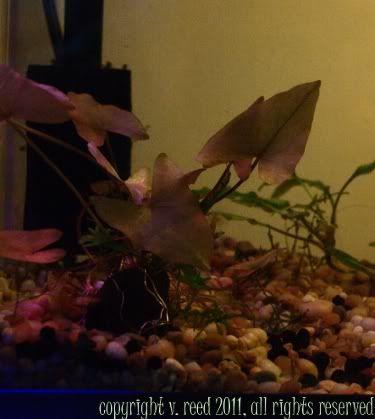 |
| Tiger lotus |
- Aquarium gravel
- Peacock moss coconut husk
- Cryptocoryne lutea baby plants
- 3 Marimo Cladophora aegagropila
- Tiger lotus
- more Red Cherry shrimp
In the meantime, check out the
AQ Advisor link in the Tools section. In the short time this aquarium livestock tool has been available, almost a thousand freshwater species have been added as well as a salt water calculator and a new forum. Stop by and show the AQ Advisor some love!


Friday, July 2, 2010
Tank Acclimation Follow Up: Secrets of Benificial Bacteria
This is a follow up post to Tank Acclimation Phase I.From the National Science Foundation posted today June 30, 2010 excerpt:
Bonnie Bassler spends her days listening to bacteria talk to one another, and what she has overheard may surprise you.And . . . ? Well if you are interested in cultivating beneficial bacteria in your aquarium's filter to balance the nutrients in the water column, this article may be of interest to you. It is the beneficial bacteria cultivated during tank cycling that does the heavy lifting in the balancing of your aquarium's biosphere. Thanks to Ms. Bassler and the National Science Foundation for the additional insight.
It turns out that these tiny, single-celled organisms are taking roll call. Each whispered conversation is an attempt to count how many of their own kind are present before they try to mount an attack on their host organism, which might very well be your body.
As Bassler explains it, bacteria "are too small to have an impact on the environment if they simply act as individuals." What they lack in size, though, they make up for in numbers.
[Read the rest of the NSF article]
Friday, May 14, 2010
CO2 Use in Aquariums and Bed Bugs
We promised We would document our tank experiences honestly; the good, the bad and now the very ugly.
So, you might be wondering what that has to do with the aquarium hobby.
Plenty if you are injecting CO2; both the DIY and the cylinder versions.
We had found a long-lasting combination recipe using a two 2L bottle rig. We had found a way to eliminate leaks in the form of our brine-shrimp hatchery caps. We were getting great CO2 distribution for a solid three weeks before having to replace a bottle solution. Life was good, plants were pearling even under reduced lighting, fish were not distressed. The couch was moved right next to the fish-rack to allow an up close and personal view of all the hard work, weeks of research and buckets of ducats spent.
Then the bite marks started showing up.
It seems our apartment building has had an infestation for some while. Somehow our apartment was never an attractive place for the voracious little beasties to investigate, until we began juicing our aquariums with DIY CO2.
The first thing the bug-guys said was; "Move the couch away from your tanks." The second thing they could have said, was not necessary. Now we go completely low-tech.
All broad-leaf and moderate to low light plants.
NO CO2 of any kind.
Next we get to have a clear-out in preparation for the bug-guys.
Every exposed shelving unit must be cleared, except for the one where the tanks actually sit. The closet shelf must be cleared, the clothes must be washed in 180F water and sealed in plastic bins. All the furniture must be moved away from the walls. Everything that can be put in storage, must be put in storage, sealed. You can be sure I will be throwing a lot of stuff out just to avoid having to deal with it. All the fabric I have collected for rag rugs will go, the yarn is in plastic bags. It will be sealed in more bins with diatomaceous earth on the bottom of the bins. All the bedding has already been thrown out and the bed removed despite the fact that neither showed any signs of being infested. Sleeping on the couch is a habit that I am glad I did not break. I have super easy to clean modular furniture which sits 18" off the floor and has no skirting for the beasties to climb up.
The bug-guys have to come out and treat the apartment three times before it will be reasonable to presume the beasties are d.e.a.d. So pretty much the whole summer the apartment will be empty, my loom will not be warped for use and I will be living in my work out clothes, sleeping with my pants tucked into socks and hands wrapped to prevent them from getting to my arms..
Bed bug infestation is not due to poor housekeeping.
It is due to one thing; bed bugs are attracted to CO2, and they eat one thing - blood.
They hide in the walls, carpets, cloth furniture, wall sockets, heating and cooling duct work, cracks, crevices and crannies. You almost never see them because they are nocturnal.
Some people have used diatomaceous earth as a dusting everywhere on the floors to kill the bugs; however inhaling diatomaceous earth is as bad for your lungs as it is for the bugs. So you have been warned.
Reference Links:
BrickUnderground.com NYC Landlords may have to disclose bed bug infestations to potential renters going back five years.
Harvard School of Public Health "Repeated exposures to bed bug bites during a period of several weeks or more causes people to become sensitized to the saliva of these bugs; additional bites may then result in mild to intense allergic responses." However, bed bugs are not known to carry any diseases like mosquitoes do.
Treating the bites: http://www.bedbugsguide.com/bed-bug-bites.htm
And yes, there are forums and message boards:
http://bedbugger.com/forum/
http://thebedbugresource.com/phpBB2/index.php
Please consider the expense of new mattresses, bedding, bed-bug proof mattress bags, exterminators, clothing, shoes, antihistamines and sanity. Proceed with caution.
Link to Follow-Up, May 22, 2010
Standard disclaimer: we are not scientists, we do not pretend to be. We are keen observers of cause and effect, enabling us to draw conclusions. Our conclusions herewith were confirmed by the professional bug-guys.By now most everyone who listens to a radio or watches TV is aware that there is a rise in bed bug infestations in the States. Hotels in New York city were the first to be reported upon a few years ago and now apartment buildings and single family homes in both urban and suburban areas have been infested. The major reason cited for the rise in bed bug infestations is the discontinuation of the use of DDT, for sound reasons. However, bed bug infestations are one of the unplanned for consequences.
So, you might be wondering what that has to do with the aquarium hobby.
Plenty if you are injecting CO2; both the DIY and the cylinder versions.
We had found a long-lasting combination recipe using a two 2L bottle rig. We had found a way to eliminate leaks in the form of our brine-shrimp hatchery caps. We were getting great CO2 distribution for a solid three weeks before having to replace a bottle solution. Life was good, plants were pearling even under reduced lighting, fish were not distressed. The couch was moved right next to the fish-rack to allow an up close and personal view of all the hard work, weeks of research and buckets of ducats spent.
Then the bite marks started showing up.
It seems our apartment building has had an infestation for some while. Somehow our apartment was never an attractive place for the voracious little beasties to investigate, until we began juicing our aquariums with DIY CO2.
The first thing the bug-guys said was; "Move the couch away from your tanks." The second thing they could have said, was not necessary. Now we go completely low-tech.
All broad-leaf and moderate to low light plants.
NO CO2 of any kind.
Next we get to have a clear-out in preparation for the bug-guys.
Every exposed shelving unit must be cleared, except for the one where the tanks actually sit. The closet shelf must be cleared, the clothes must be washed in 180F water and sealed in plastic bins. All the furniture must be moved away from the walls. Everything that can be put in storage, must be put in storage, sealed. You can be sure I will be throwing a lot of stuff out just to avoid having to deal with it. All the fabric I have collected for rag rugs will go, the yarn is in plastic bags. It will be sealed in more bins with diatomaceous earth on the bottom of the bins. All the bedding has already been thrown out and the bed removed despite the fact that neither showed any signs of being infested. Sleeping on the couch is a habit that I am glad I did not break. I have super easy to clean modular furniture which sits 18" off the floor and has no skirting for the beasties to climb up.
The bug-guys have to come out and treat the apartment three times before it will be reasonable to presume the beasties are d.e.a.d. So pretty much the whole summer the apartment will be empty, my loom will not be warped for use and I will be living in my work out clothes, sleeping with my pants tucked into socks and hands wrapped to prevent them from getting to my arms..
Bed bug infestation is not due to poor housekeeping.
It is due to one thing; bed bugs are attracted to CO2, and they eat one thing - blood.
They hide in the walls, carpets, cloth furniture, wall sockets, heating and cooling duct work, cracks, crevices and crannies. You almost never see them because they are nocturnal.
Some people have used diatomaceous earth as a dusting everywhere on the floors to kill the bugs; however inhaling diatomaceous earth is as bad for your lungs as it is for the bugs. So you have been warned.
Reference Links:
BrickUnderground.com NYC Landlords may have to disclose bed bug infestations to potential renters going back five years.
Harvard School of Public Health "Repeated exposures to bed bug bites during a period of several weeks or more causes people to become sensitized to the saliva of these bugs; additional bites may then result in mild to intense allergic responses." However, bed bugs are not known to carry any diseases like mosquitoes do.
Treating the bites: http://www.bedbugsguide.com/bed-bug-bites.htm
And yes, there are forums and message boards:
http://bedbugger.com/forum/
http://thebedbugresource.com/phpBB2/index.php
Please consider the expense of new mattresses, bedding, bed-bug proof mattress bags, exterminators, clothing, shoes, antihistamines and sanity. Proceed with caution.
Link to Follow-Up, May 22, 2010
Saturday, April 3, 2010
Mods and Updates

Now that we have our brine shrimp hatchery caps on the DIYCO2 2L bottles, we finally drilled the water intake of the filter and inserted the outflow from our CO2 into the intake. This modification serves two purposes; first it delivers CO2 to the impeller which then breaks up the bubbles, dissolving them before returning the filtered water to the tank. Second, the filter intake serves as a bubble counter. We are able to see the drop off of bubbling and better monitor changing the DIYCO2 solutions. The more completely dissolved the CO2 is in the water, the more available carbon dioxide there is for plant use. The only bubbles you want floating to the surface are the micro-fine oxygen bubbles plants exhale.

These are the solutions we use:
Long Lasting Jello Solution
1 2L soda bottle and a funnel
1 pkg unflavored gelatin
1c sugar
1 tsp yeast
Into 2c hot water dissolve 1c sugarand 1pkg unflavored geletin, pour into a shallow pan, refrigerate until set
Slice jello into strips 1/2" or less wide, turn pan slice again, the smaller the cubes the easier they go through the funnel into the bottle, when the cubes get stuck, use a skewer or knitting needle to force them through the neck of the funnel
Pour 1pkg yeast into 2L bottle, then fill with water to where the curve of the bottle starts, do not overfill. Cap, insert air hose, shake a gently to help distribute the yeast. You may see the solution begin reacting right away or it may take 1/2hr to 1hr to begin reacting.
If your solution begins to react vigorously and bubbles into the airline hose you can remove the cap, wait until the reaction slows; some place a check valve on the airline hose to prevent solution from entering the tank and tank water from back washing into the hose.
Using a longer air line hose and making a service loop will also keep the solution from entering the tank and vice versa. Some employ an intermediary bottle of plain water to serve the same purpose. Run the CO2 line from the 2L bottle into a smaller, airtight container of plain water, then run another hose from the smaller container to your tank.
{hose from CO2 must be in the plain water, hose from the water to the aquarium must not be in the plain water}
I find these steps unnecessary; we place our solution above our tanks allowing the downward pressure of the CO2 to do the job of the check valve.
The regular DIYCO2 solution:
2L bottle with airline from cap long enough to enter your tank filter or other diffusion device.
2c hot water, to this add 1c sugar, dissolve
1 tsp yeast
The method is essentially the same; dissolve the sugar in very warm water, let cool to tepid
Pour sugar solution into 2L bottle, add yeast, fill with water to bend in bottle. Never put yeast into hot water, you will kill it. Yeast is most active between 86F and 100F. Do Not Overfill.
Cap and position for use with your aquarium. This solution will produce CO2 for 2-3 weeks. You can pour off some of the solution after a week and replace the water plus a teaspoon of sugar, lowering the alcohol content and supplying fresh food for the yeast. If you do this, add the sugar first, then slowly add the water. It will fizz up like champagne, so do it in the sink.

One last note about getting the CO2 into the aquarium water; the Hagen AquaClear Aquarium Filter

has a little hole next to where the intake pipe attaches to the filter, your airline hose will fit into this hole if you thread the top of the AquaClear onto the airline hose first. Do not force the airline hose, it only needs to go in far enough for the friction to hold it in place. Make sure your filter is primed and running when you insert the hose; if the filter is not running, the impeller will sometimes not start when you turn the filter on. The opening slot in the top of the AquaClear is just wide enough to accommodate both the knob on the top of the intake and airline hose. It will be a snug fit.

Feel free to leave comments or ask questions. Below is a list of video clips showing various methods of rigging your DIYC02. We have not tried all the rigs, we concentrated on finding the most efficient liquid solution to produce CO2.
Quick Directions: http://www.youtube.com/watch?v=edoUwvaVy-M
The Full Explanation: http://www.youtube.com/watch?v=IZFM9ZpaqGM&feature=related part 1 of 2, we love this kid. He did a really good job teaching.
Pt 2, The Diffuser: http://www.youtube.com/watch?v=uaVqxwaF8Y0&feature=related have we said we love this kid?
Alternative Bottle w/Better Seal? http://www.youtube.com/watch?v=k1LygSE0ByY
As always thanks for reading. Comments and questions are always welcome.
Tuesday, March 30, 2010
A Weedy Mess, again

We are supposed to learn from our mistake; it is said a wise man learns from the mistakes of others.
Not having learned from the weedy mess of a failed attempt at cultivating Ludwigia Needle Leaf; we again have a weedy mess in the form of poorly anchored Cabomba and Didiplis diandra, disintegrating at half the rate the Ludwigia had.
The 10g:redux never really was rescaped when the new plant shipment came in; getting that moss wall started in the 10g:view was time sensitive. Sorry about the soft focus on some of these shots.

The planting in this tank does not look all that dense however all the taller plants ended up in the mid-ground.
The Cambomba will be moved to the back of the tank, the Giant Hairgrass is all but gone.

The Cabomba grew tall but did not branch due to lack of
pruning. As a result, it ended up making a canopy across the
top of the aquarium, competing with our patch of floating Riccia.

The moss wall has a start however we reserved quite a bit in case of disaster and hung it in a mesh bag. The moss wall is not growing through, perhaps moving the plants out of the way and laying it down so that the fronds grow toward the light will help speed things along.

In the meantime the silicone holding the airline into the caps of the DIY CO2 bottles tends to work it's way loose after a month or two. So a solution that does not involve stinking up the apartment every other month had to be found.

The cap on the right is a Brine Shrimp breeding cap. For size comparison, the cap on the right is a standard US 2L soda bottle cap. As you might guess; a perfect fit with no leaks. The brine shrimp cap can be purchased on ebay [here].

While cleaning out the bottles, we discovered after two weeks, this DIYCO2 jello based solution still had jello solids in the bottom.

Just for fun, we poured off the excess alcohol/water mixture from two weeks of CO2 production. Before we could finish preparing a new sugar solution, the leftover yeast became active and started processing the newly exposed jello.

There is quite a bit of Cobomba left in the champagne bucket to be replanted on the back wall. It grew roots from the center of the stems down into the substrate so, it will be topped and
The strange, dark looking thing on the left is a DIY filter sock. It was fabricated of a thin layer of filter fiber between two layers of net tulle. It serves as a pre-filter, should we ever have livestock offspring again, they will not end up sucked into the filter. Cleaning this little sock is pretty simple, pull it off the intake, run it under water from the tap, replace it. If we catch it every time it looks dirty, as it does in this shot, it keeps a lot of gunk out of our filter and acts to breed some beneficial bacteria as well.
That is it for today. When the second tank refills, we will post some night shots, without the annoying glare on the glass.
Tuesday, December 29, 2009
Tank Logs
Tank logging is the practice of keeping statistics on your aquariums. It can be as simple as a blank book with hand written notes to as sophisticated as pie charts and photos.
What types of information do we need, when and what do they tell us?
The water test kit you purchased when you purchased your aquarium set up hardware should include the following tests, ph, ammonia {NH(3)}, nitrIte {NO(2)}, nitrAte {NO(3)} and most master kits include a test for ph2 or high ph. Additionally, you should have purchased GH {general hardness} and kH {carbonate hardness} solutions and a thermometer.

We then transferred our readings to very nice, free tank log on Badman's Tropical Fish website. Their tank log system is more extensive than this simple format. It gives you a place to record multiple tanks, equipment and livestock as well as some other nice features. This was extremely helpful for research purposes and comparing hardware specifications. Our tank chem readings and records were the first thing we did every morning while the coffee was brewing. Truth be told, our tank logs have fallen into disarray as we have not kept up the dual logging system we started with. Nevertheless, these logs are very important; you can see our 10g:view log here.
The reason the dual logging system fell into disarray is that we were recording the same information twice, every morning. Not such a big deal, except that class schedule got in the way and something had to go. We looked online for free tank log software; sadly there are not many choices and "free download" does not mean "free software". Our requirements for the software we chose to test are as follows:
- Free: this is nothing more than a simple database so paying an arm and a leg was out of the question for a student. We were willing to go as high as $20.oo, as we believe a workman is worth his wages. Programmers have to eat, too.
- Specifically for or customizable to fresh water flora and fauna. Seems the reef keepers need to test and document many more parameters than fresh water aqua-culturists. All that extra recording space is bound to be confusing to someone brand new to the aquarium hobby.
- Printable: the ability to print out whatever information one chooses. Hardware specifications, water chems, fish statistics; any and all information one might need to take on a road trip to a fish store an hour away or more.
For our purposes, if we continue to use an online record keeping system, we will stick with our account at Badman's Tropical Fish.
To the software choices; we chose to test Aqua Log and Aquarium Lab. Aquarium Lab by SeaApple software is a very nice looking, feature rich program. However, it is designed with reef aquarists in mind. There are many things in this program that do not pertain to fresh water aquarists therefore; it would be somewhat confusing for the novice aquarist. However, the experienced aquarist might find it useful. At $24.95 it was just over budget.
Aqua Log on the other hand does just what we wanted a piece of software to do, record our data. It will post reminders when the program is opened based on your predefined schedule. However, that schedule is based upon the first entry of a particular item and the number of days you specify before the next action is due. For example, if we entered water change data for December 24, 2009 and set the interval for a water change to 7 days, we would get a reminder for a seven day interval. If we were monitoring something like medication in the tank, we would have to set up a different reminder evem if it were related to water changes.
The price is right, free. It does output to either a text file for importing into Excel or Calculator in Open Office or you can view it as a web page. This is where for us, it falls down. The formatting for viewing as an HTML document is so old, it does not have even a basic style sheet. As a result the table created for each entry has those thick, raised lines, we do not like those. Anyone with a bit of HTML/CSS style sheet knowledge could easily clean up the output by copying it from the html page source and slapping it into another page with a properly formatted CSS style sheet in the header. Piece of cake but not for a novice.
This program also gives you the ability to print a blank data form for notes or to take with you on that road trip. However; if you want to print your actual data log, better do it from an Excel or Calculator spreadsheet. You will have much more control over the final print.
That wraps up this combined article on tank logging, what you need to know during tank cycling as well as a super-quick review of some tools to help you out. We hope you found this information useful.
The image of the tank data sheet up there at the beginning of this article was created as a 3x5" image to demonstrate how little space and effort daily logging takes. It has been downsized to fit the article. The benefits of tank logging can save your foggy memory and some cash on occasion.
In this series:
- Holiday Aquarium Purchasing
- Newly Purchased Tanks
- New Tank Cycling & Acclimation Phase I
- Tank Logs - this article
Subscribe to:
Posts (Atom)